The Fastest Way to Set Up DMARC, DKIM, and SPF: Easy Email Authentication Deployment Explained

People tend to think of setting up email authentication with DMARC, DKIM, and SPF as time-consuming and error-prone because they have to search the Web for various articles and tools to achieve a simple DMARC, DKIM and SPF setup. This can take days for those who aren't proficient in email authentication.
In this article, I am going to show you how to use an all-in-one and end-to-end tool to achieve a basic DMARC, DKIM, and SPF setup in 7 simple steps, within 1 hour, with permissive settings appropriate for most organizations. Depending on how fast your DNS propagation goes, the process can take even less time. In a clearly defined workflow, this wizard will guide you through all the steps of creating/publishing SPF, DKIM, and DMARC records, and checking everything at the end to make sure the whole setup is functional.
Starting from zero and following this article all the way through, you will have a DMARC, DKIM and SPF setup with reporting capabilities enabled at the end.
Now let's get started! Firstly go to the wizard at: All-in-one DMARC, DKIM and SPF Wizard, and you will see the wizard's Getting Started page like this:
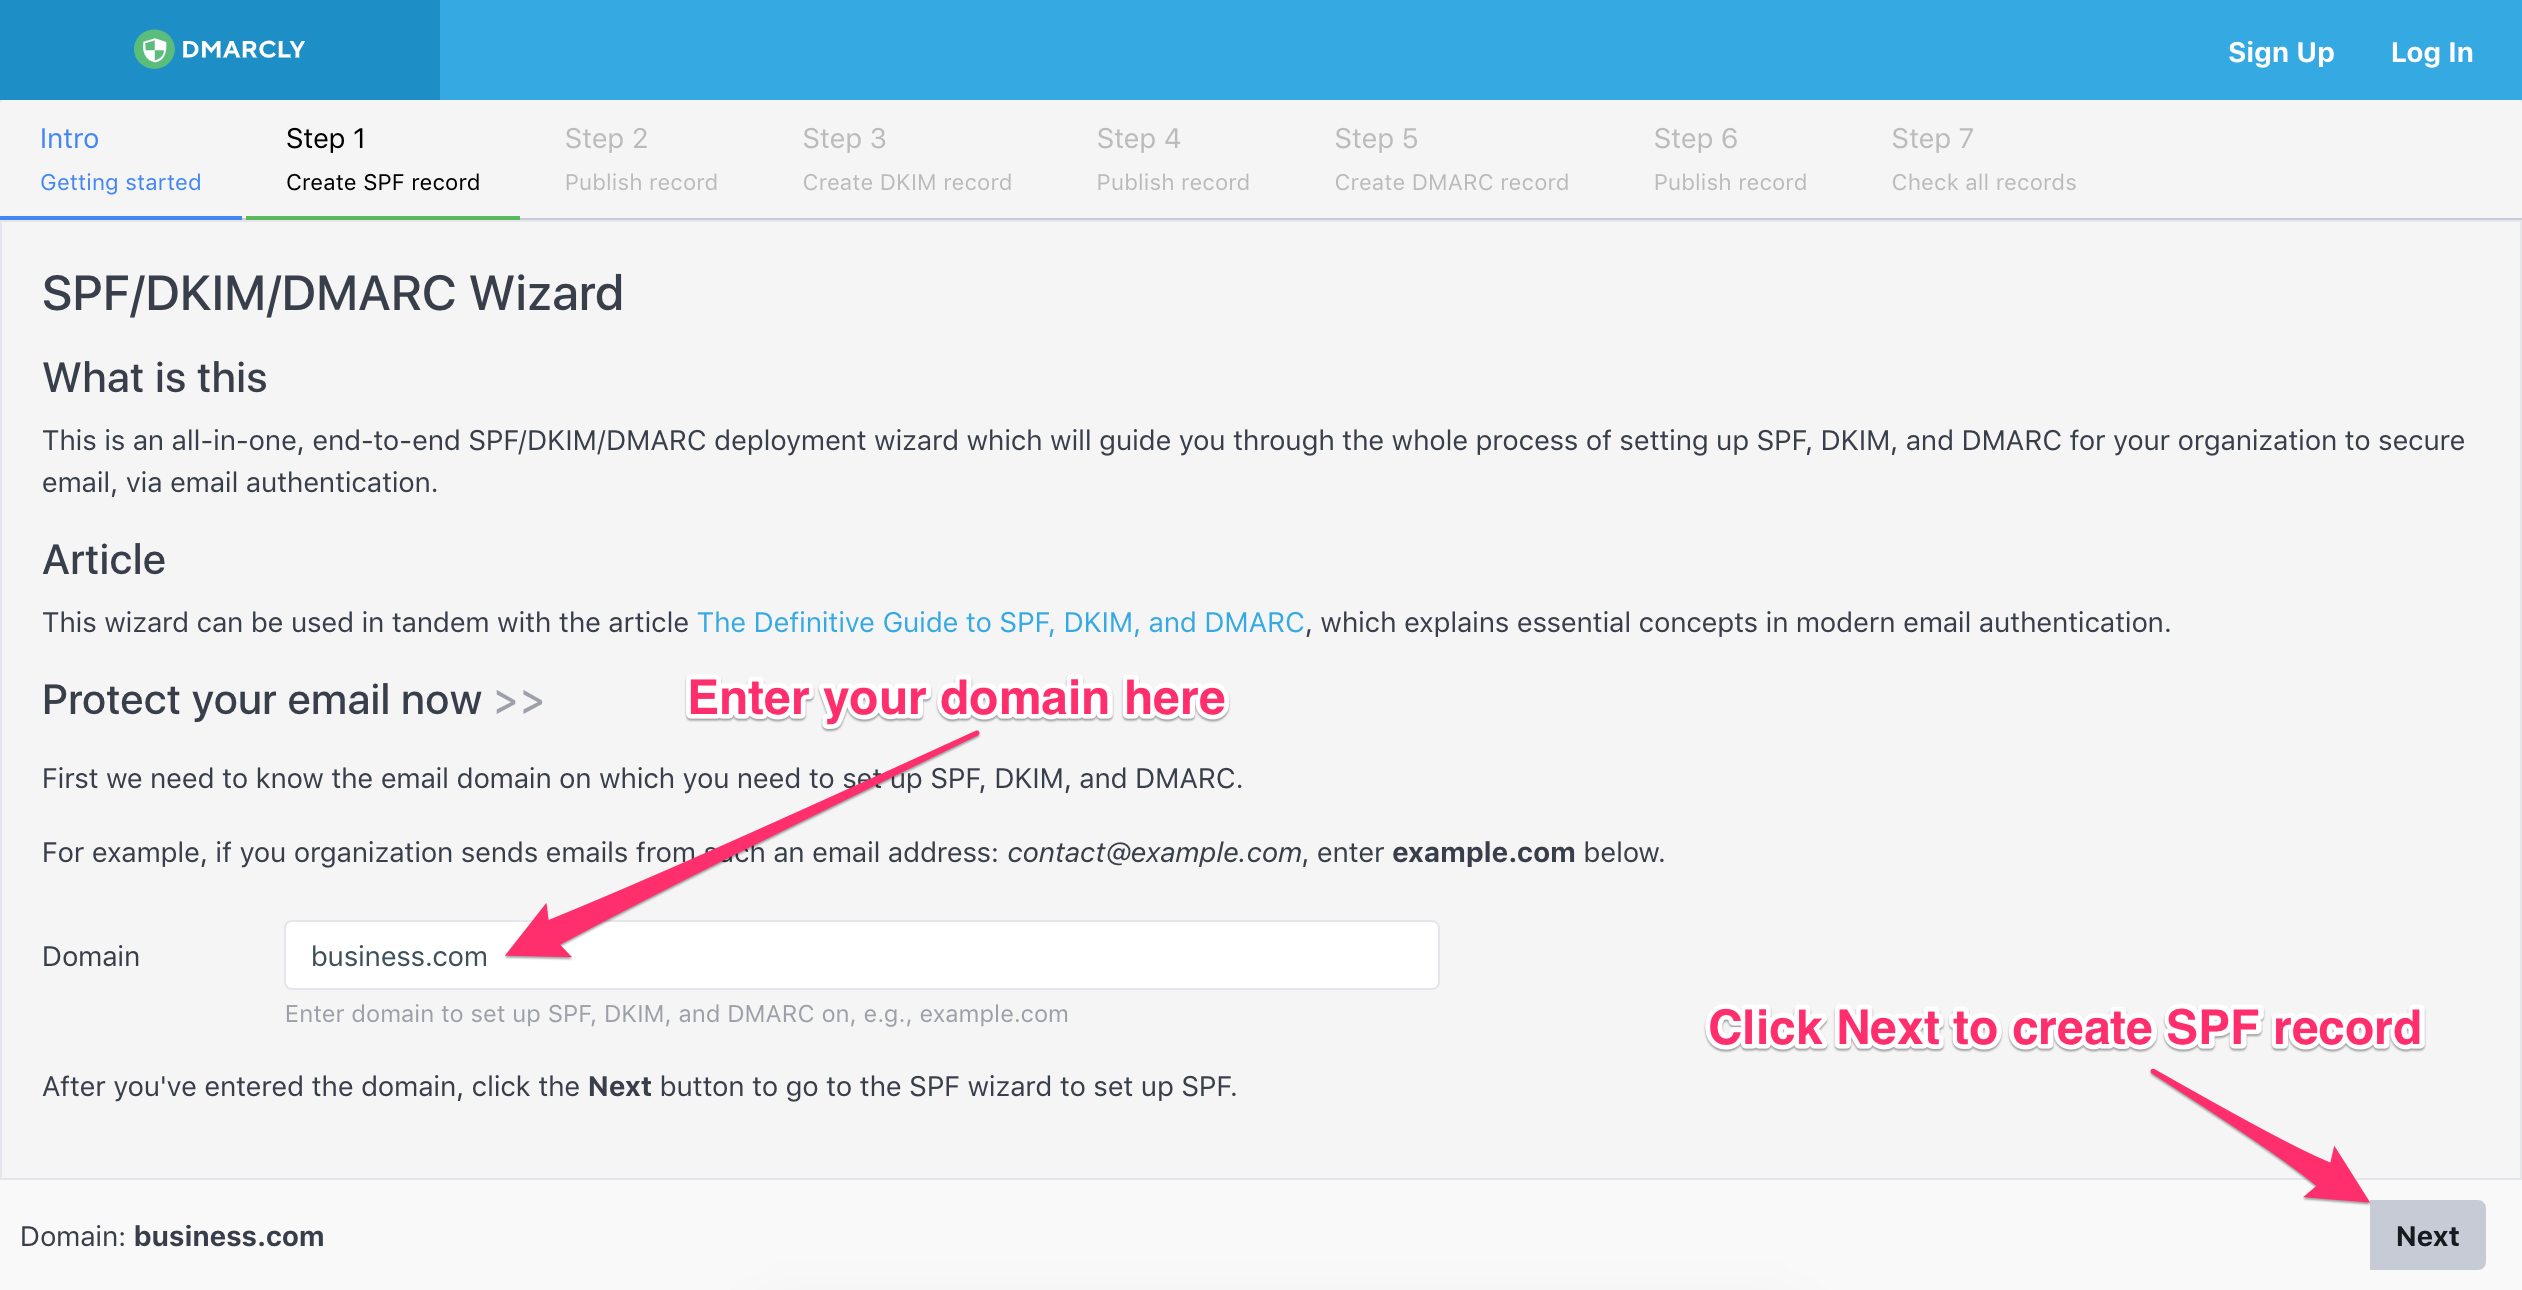
enter your email domain you want to protect, and hit the Next button to set up SPF.
Next the built-in SPF record generator pops up:
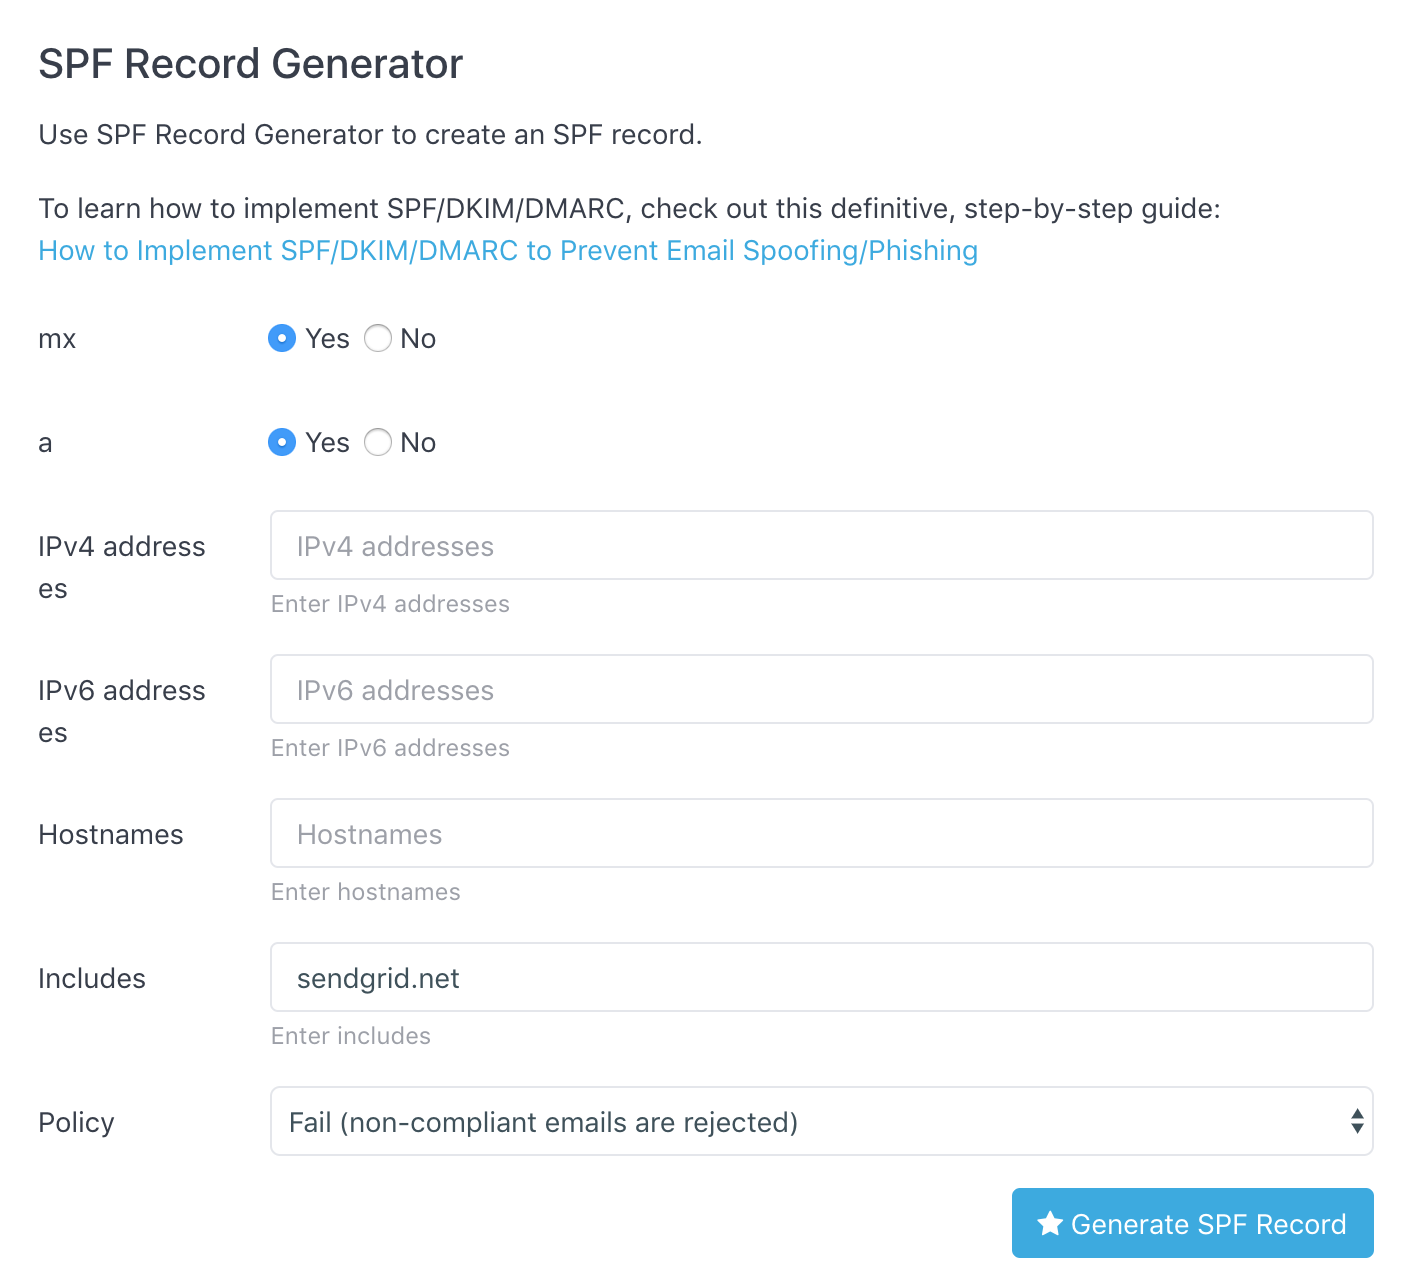
Enter the settings that applies to your domain:
- If you send emails from your own server pointed to by your domain, keep the default settings;
- If you delegate email delivery to 3rd-party services, enter them in the Includes fields as well. In the example above, I use
sendgrid.netas our 3rd-party email delivery service. If you have multiple, be sure to separate them by spaces.
Now click the Generate SPF Record button, then you will see the SPF record generated, like this:
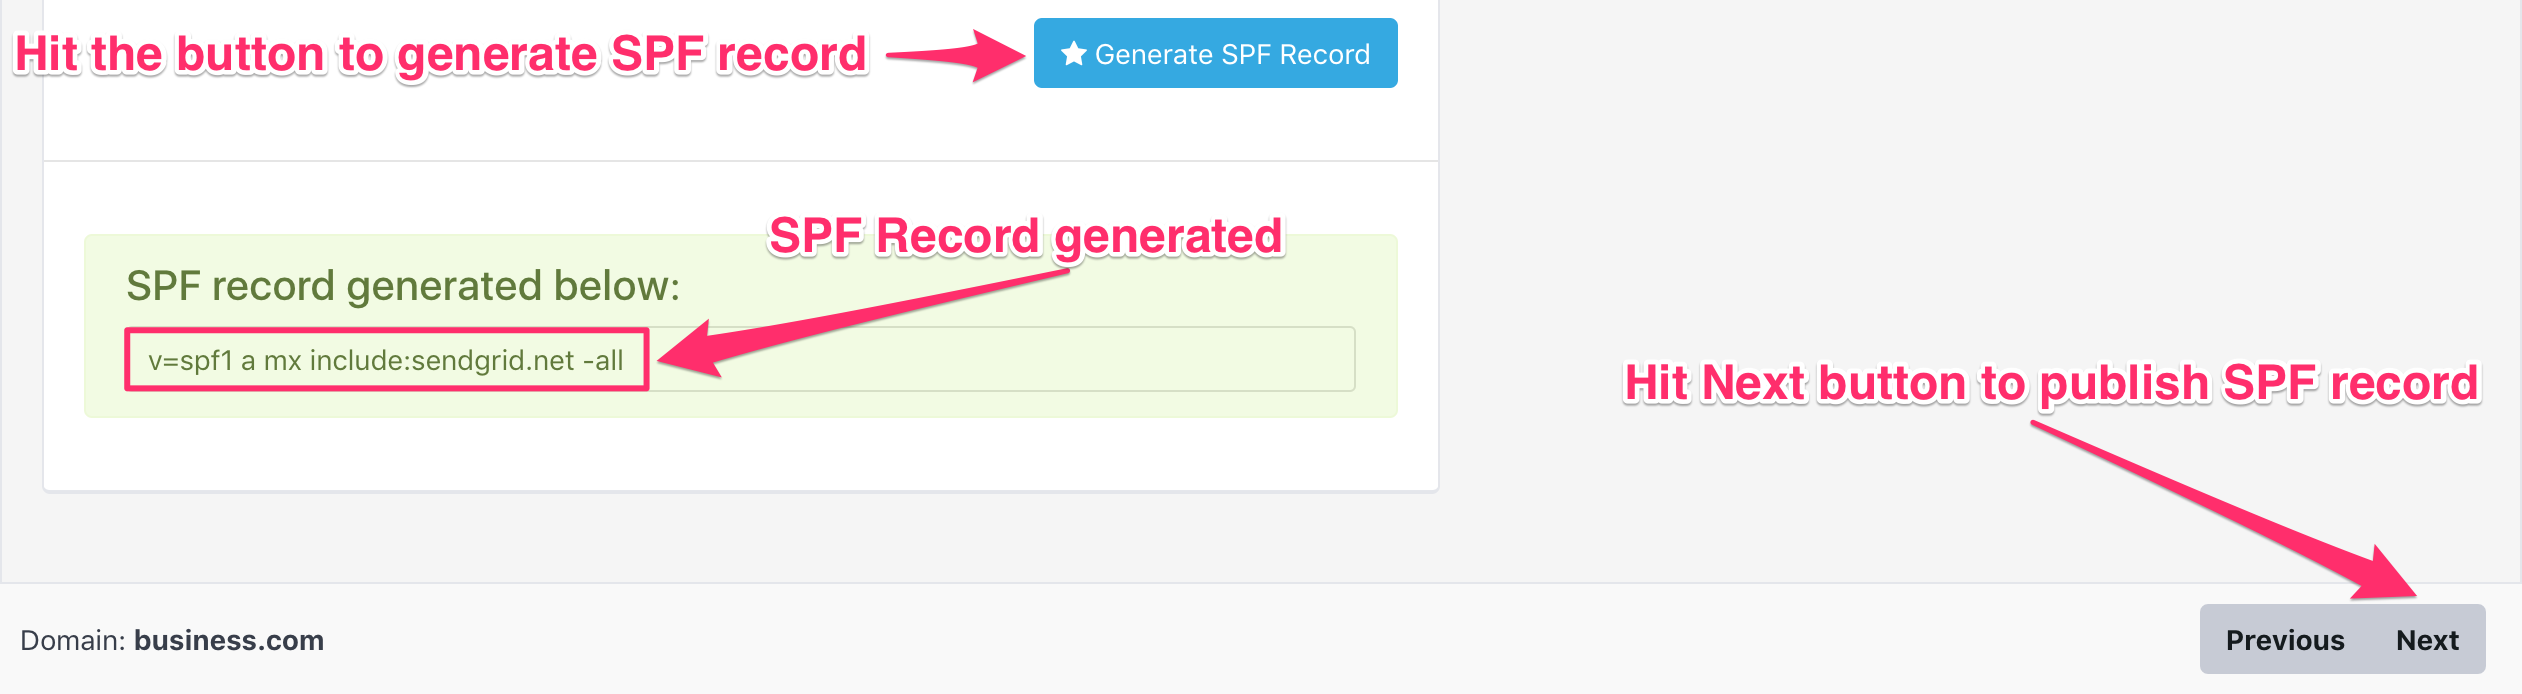
Now that you have your SPF record, click Next to publish it in the DNS. In this step, the wizard uses Godaddy as an example. If you use other DNS providers, the UI should be similar. After you are done, use our SPF record checker to confirm that the SPF record has taken effect in the DNS. Then hit the Next button to go to Step 3.
In Step 3, we are going to create 2 DKIM records. Since we are using SendGrid as our email delivery service, we can use their dashboard to create them. If you are using other email delivery services, refer to their documentation for how to create DKIM records.
Hit the Next button to go to Step 4, where you will publish the DKIM records created in Step 3 in the DNS. Use our DKIM record checker to confirm that the DKIM records have taken effect in the DNS.
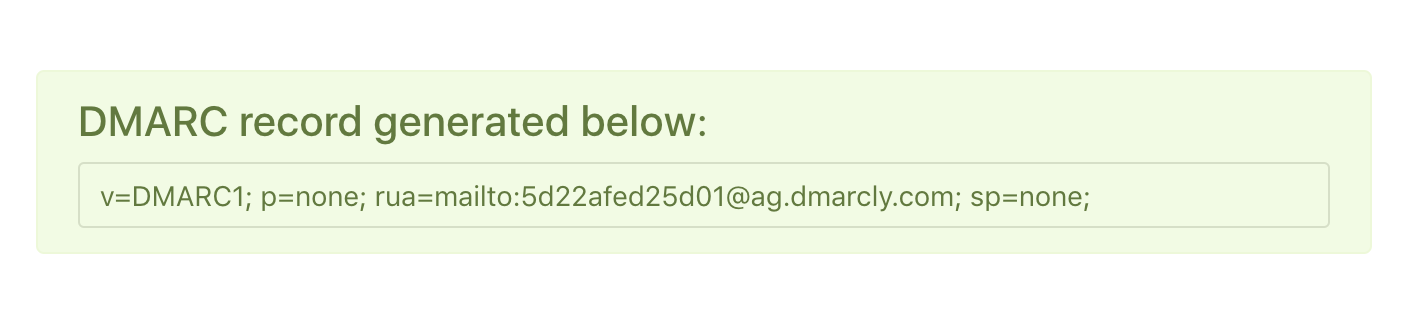
Now go to Step 5, where you will create a DMARC record. The built-in DMARC record generator looks like this:
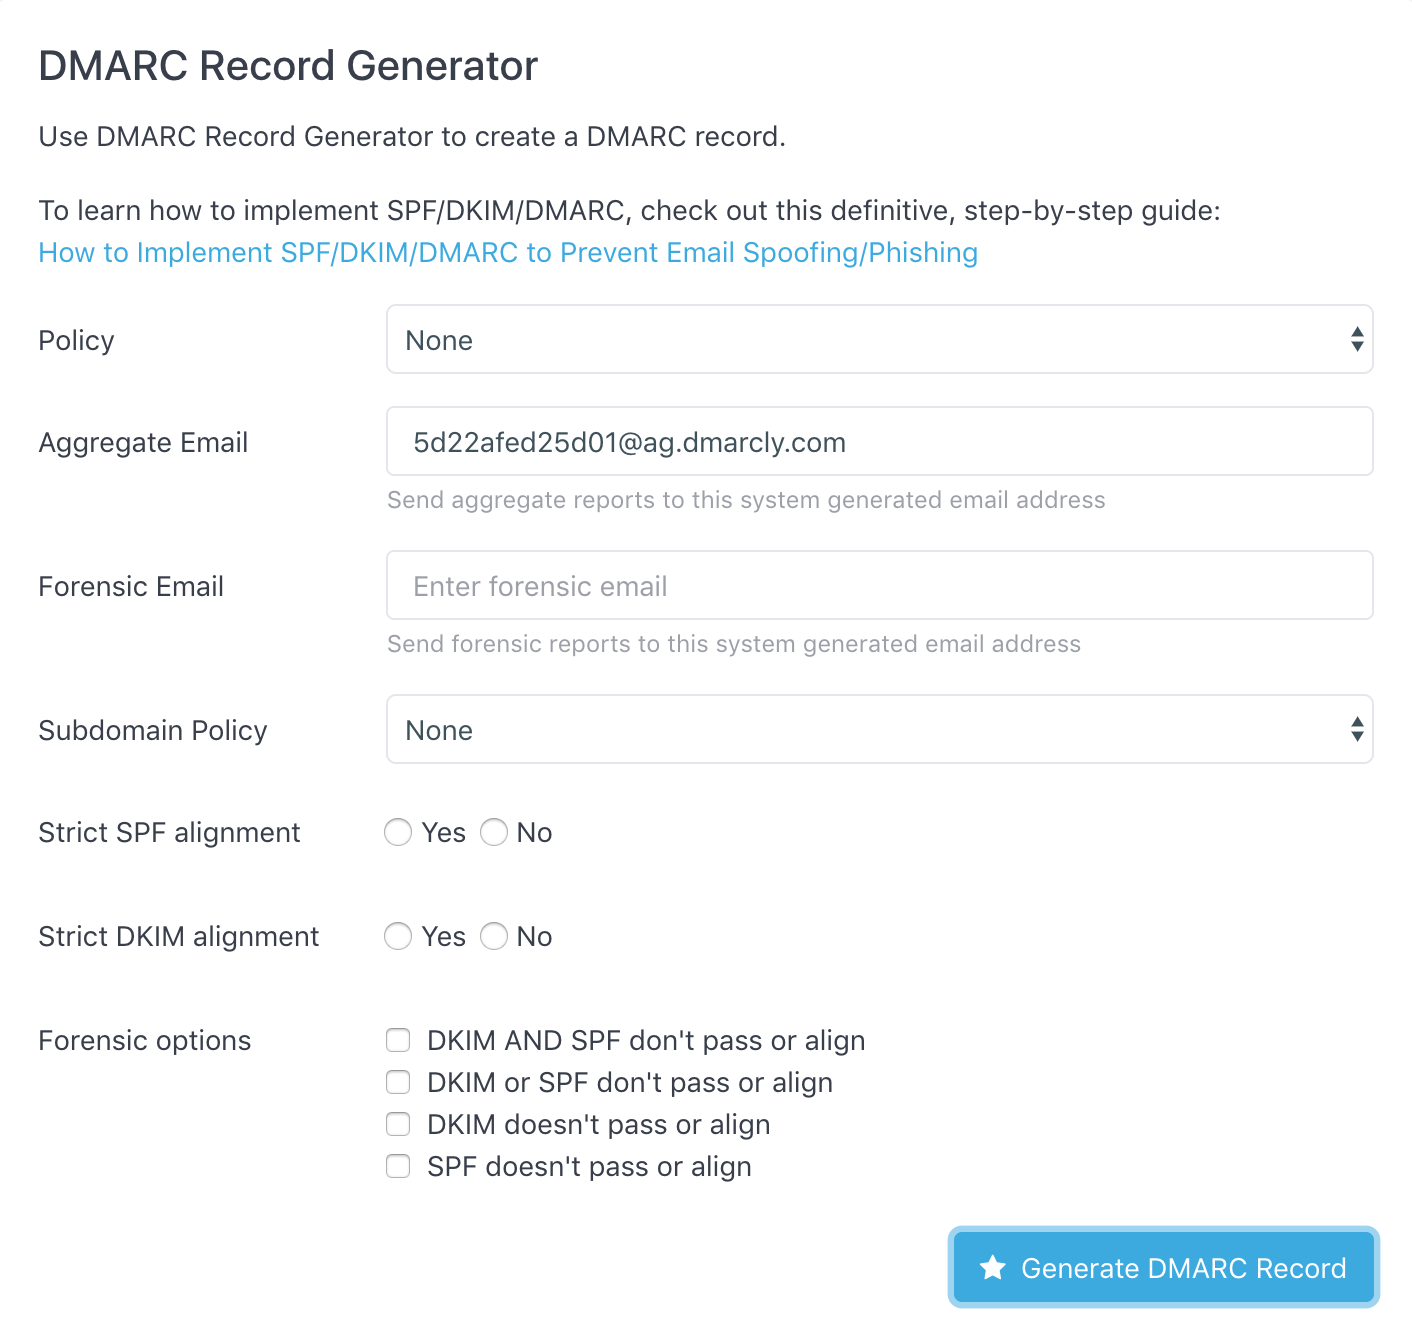
Hit the Generate DMARC Record button and a DMARC record will be generated:
Move on to Step 6 to publish it in the DNS. Similarly, use our DMARC record checker to confirm that the DMARC record has taken effect in the DNS.
Now go to the final step. Since you have performed all the steps for a basic DMARC, DKIM, and SPF deployment, let's check the entire setup! This is easier done than said: simply send an email from your domain to check@dmarcly.com, it will reply with a report on your email authentication status including SPF, DKIM, and DMARC!
Protect Business Email & Improve Email Deliverability
Get a 14 day trial. No credit card required.
Create Account