- Intro
Getting started - Step 1
Create SPF record - Step 2
Publish record - Step 3
Create DKIM record - Step 4
Publish record - Step 5
Create DMARC record - Step 6
Publish record - Step 7
Check all records
SPF/DKIM/DMARC Wizard
What is this
This is an all-in-one, end-to-end SPF/DKIM/DMARC deployment wizard which will guide you through the whole process of setting up SPF, DKIM, and DMARC for your organization to secure email, via email authentication.
Article
This wizard can be used in tandem with the article The Definitive Guide to SPF, DKIM, and DMARC, which explains essential concepts in modern email authentication.
Protect your email now >>
First we need to know the email domain on which you need to set up SPF, DKIM, and DMARC.
For example, if you organization sends emails from such an email address: [email protected], enter example.com below.
Create SPF record
Publish SPF record
Create DKIM record
If you are using a 3rd-party email delivery service, creating a DKIM record is easy enough: simply use their service to create the private/public keypair which will be kept with their service. I am going to show you exactly how to do this in SendGrid now:
-
log in to SendGrid' dashboard;
-
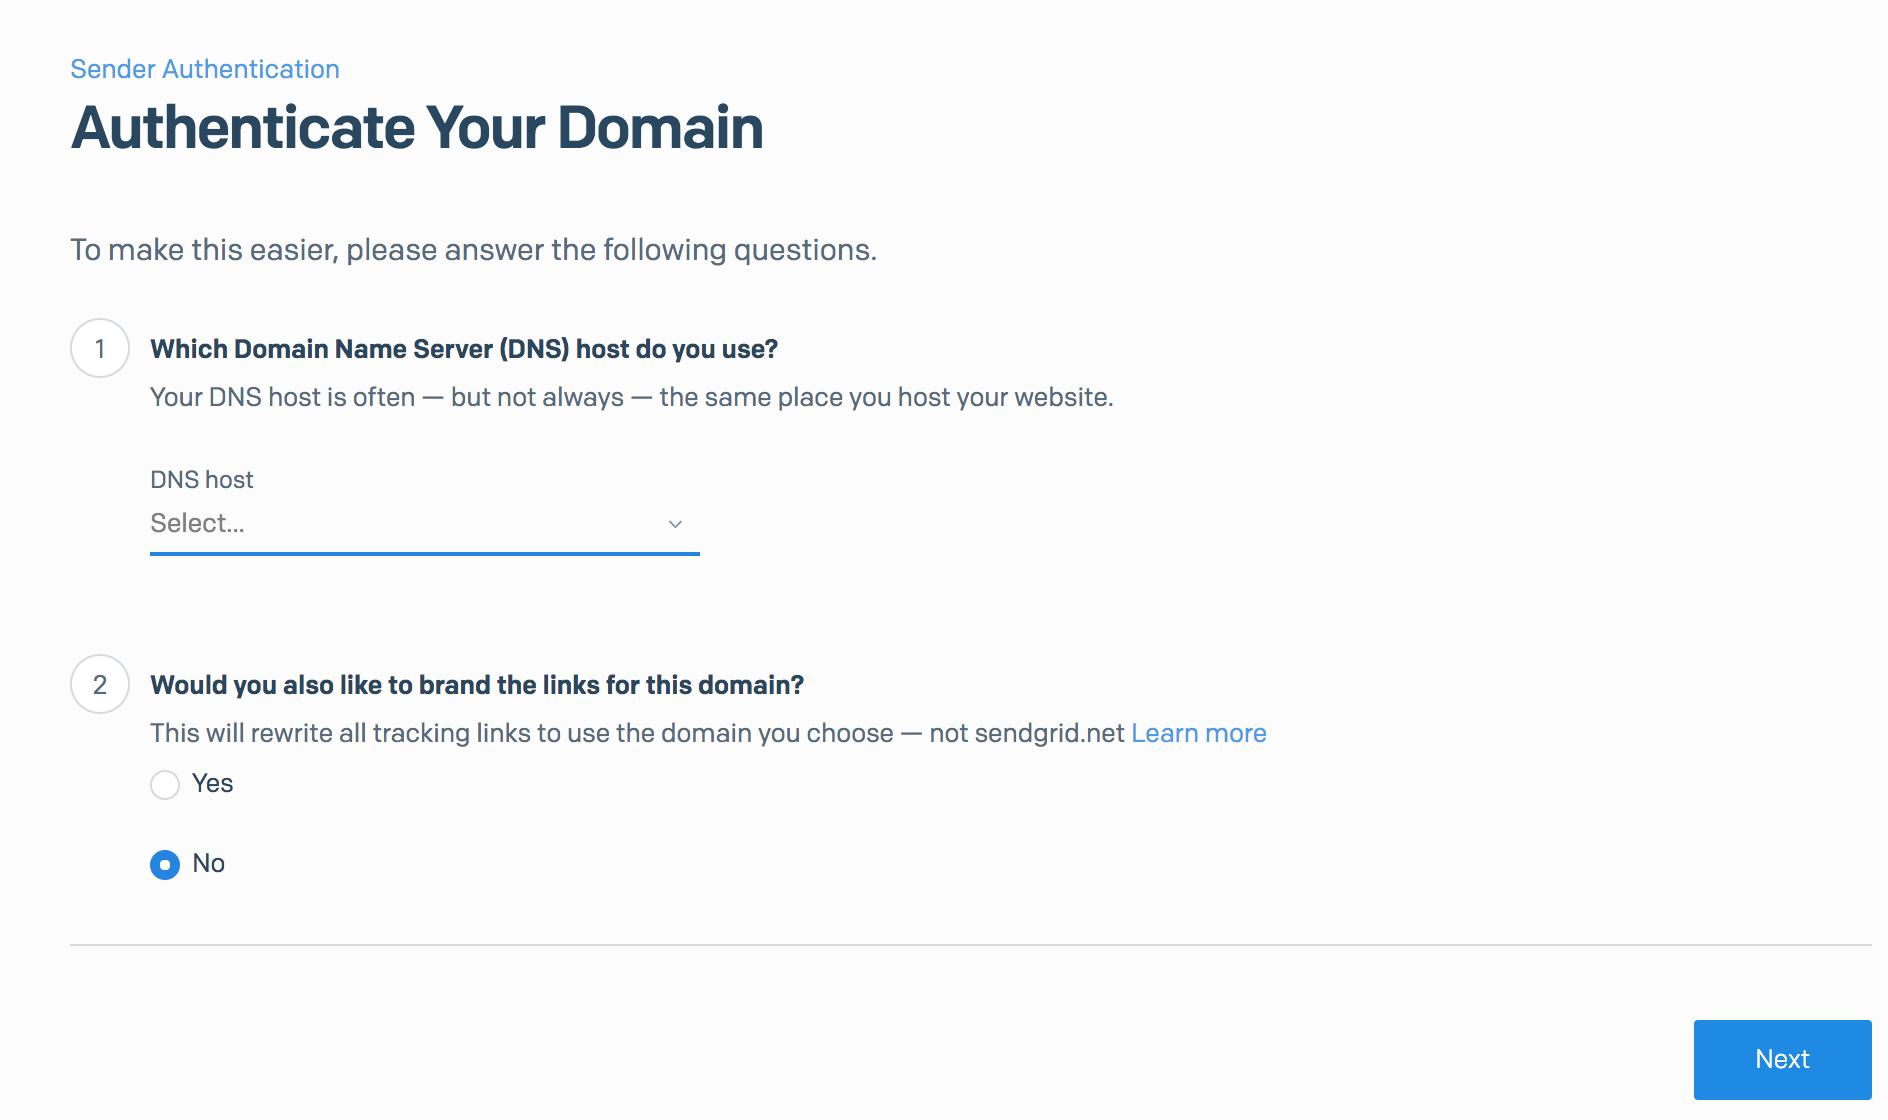
go to Settings/Sender Authentication/Authenticate Your Domain, choose your DNS host and click the Next button.
-
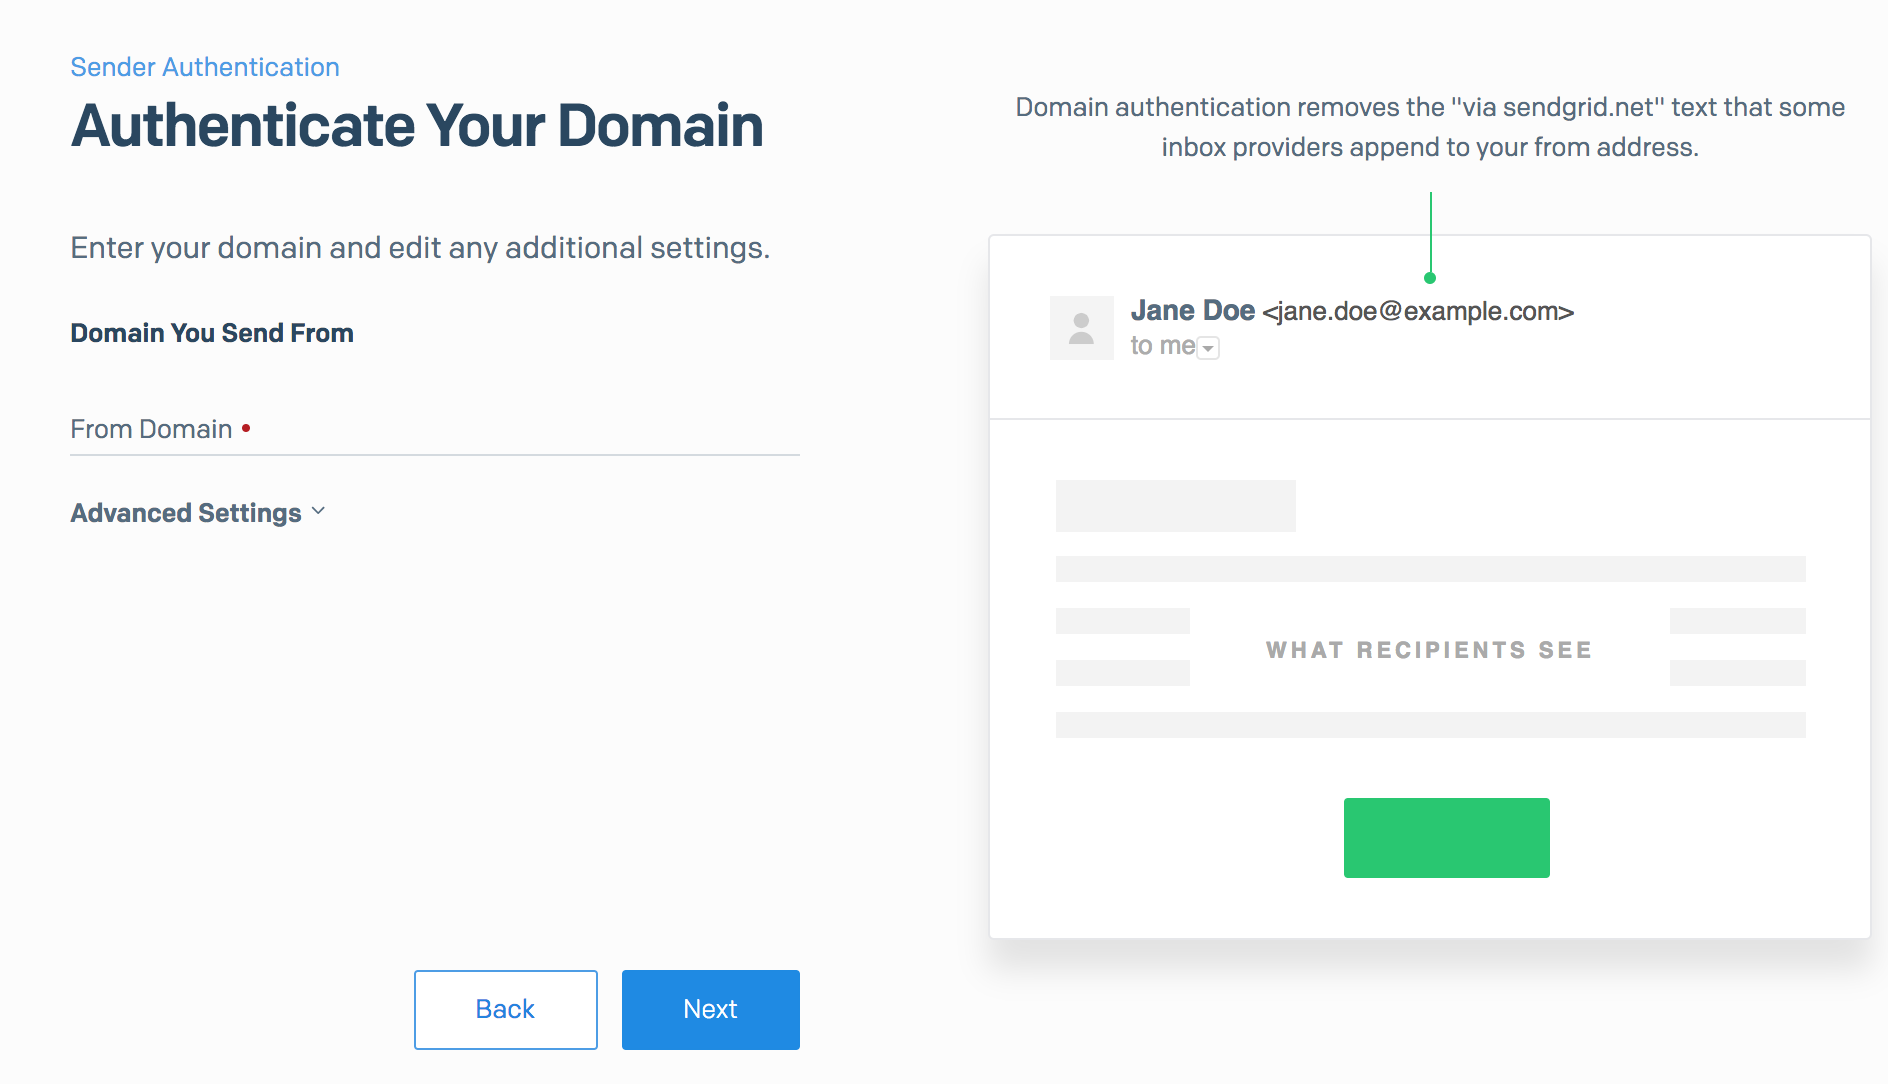
enter the domain you want to authenticate (we are using example.com), and click the Next button.
-
now SendGrid has created 2 DKIM records for you, using selectors s1 and s2 respectively, as highlighted below:
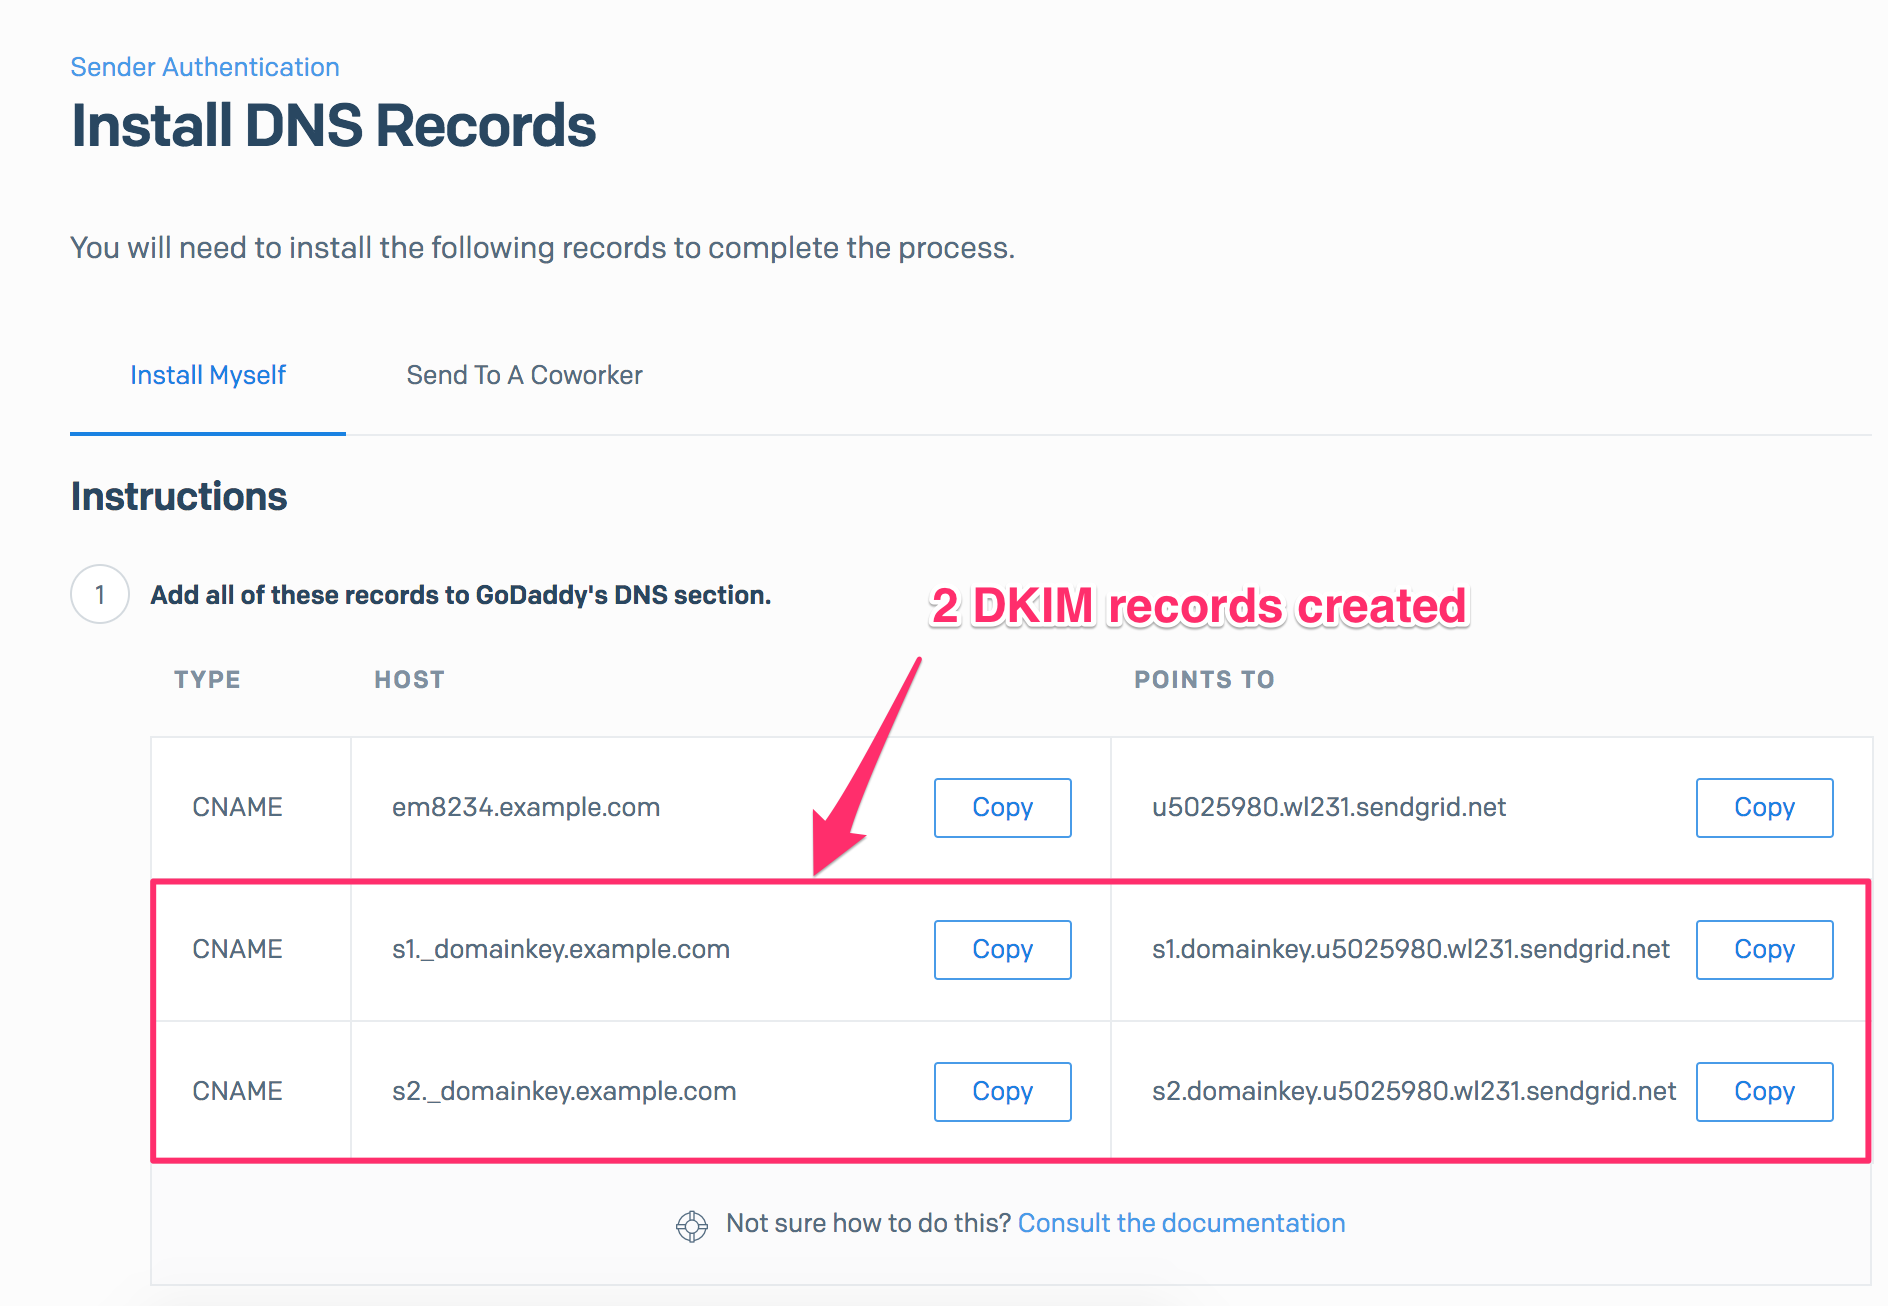
There is no private key/public key management on your end - SendGrid manages all this for you! All you have to do is to publish these 2 DKIM records for your domain in DNS.
Publish DKIM record
Publishing a DKIM record is just creating a CNAME record on (selector)._domainkey.example.com. I will show you how to do this in GoDaddy step by step:
-
Log in to GoDaddy. Click the domain in question, then click the DNS button.

-
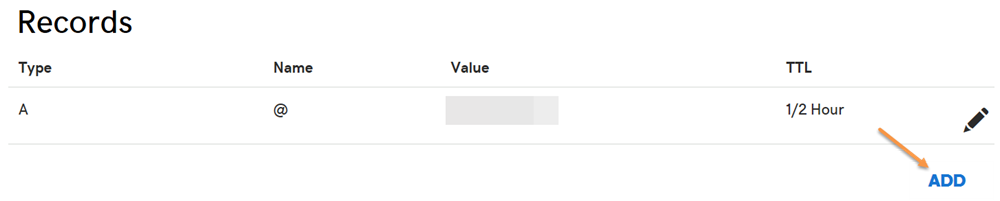
If the DKIM record doesn't exist on the domain, click the Add button under the Records section.
-
Otherwise edit it instead. To check if the DKIM record already exists, look for any CNAME record that looks like (selector)._domainkey.
-
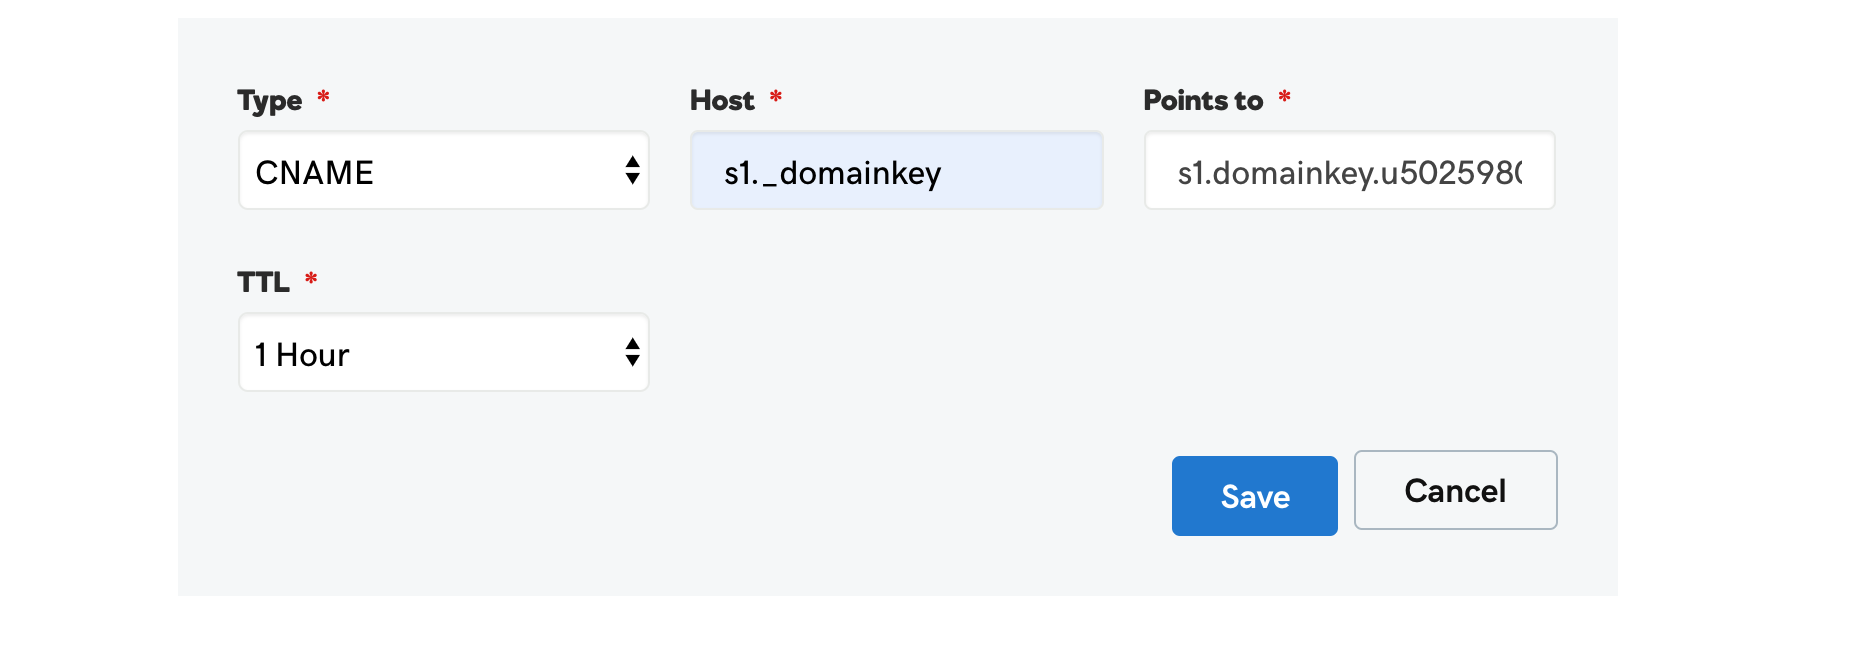
Select CNAME for the Type drop-down menu. Enter s1._domainkey for the Host field, where s1 is the selector. Enter the POINTS TO value you obtain from the "Create DKIM record" step, for the Points to field. Then click the Save button.
Create DMARC record
DMARC Record Generator
Use DMARC Record Generator to create a DMARC record.
To learn how to implement SPF/DKIM/DMARC, check out this definitive, step-by-step guide:
How to Implement SPF/DKIM/DMARC to Prevent Email Spoofing/Phishing
Warning!
DMARC record generated below:
Help on DMARC generator
What is a DMARC record?
A DMARC record is a TXT record published to the DNS for your domain, under _dmarc.yourdomain.com, where “yourdomain.com” is replaced with your actual domain (or subdomain). It tells the email receiver what to do when an email message fails DMARC authentication, and also where to send reports on email delivery statistics.
Publish DMARC record
Log in to your DNS management console, choose the domain you need to publish the DMARC record on, i.e., mycompany.com.
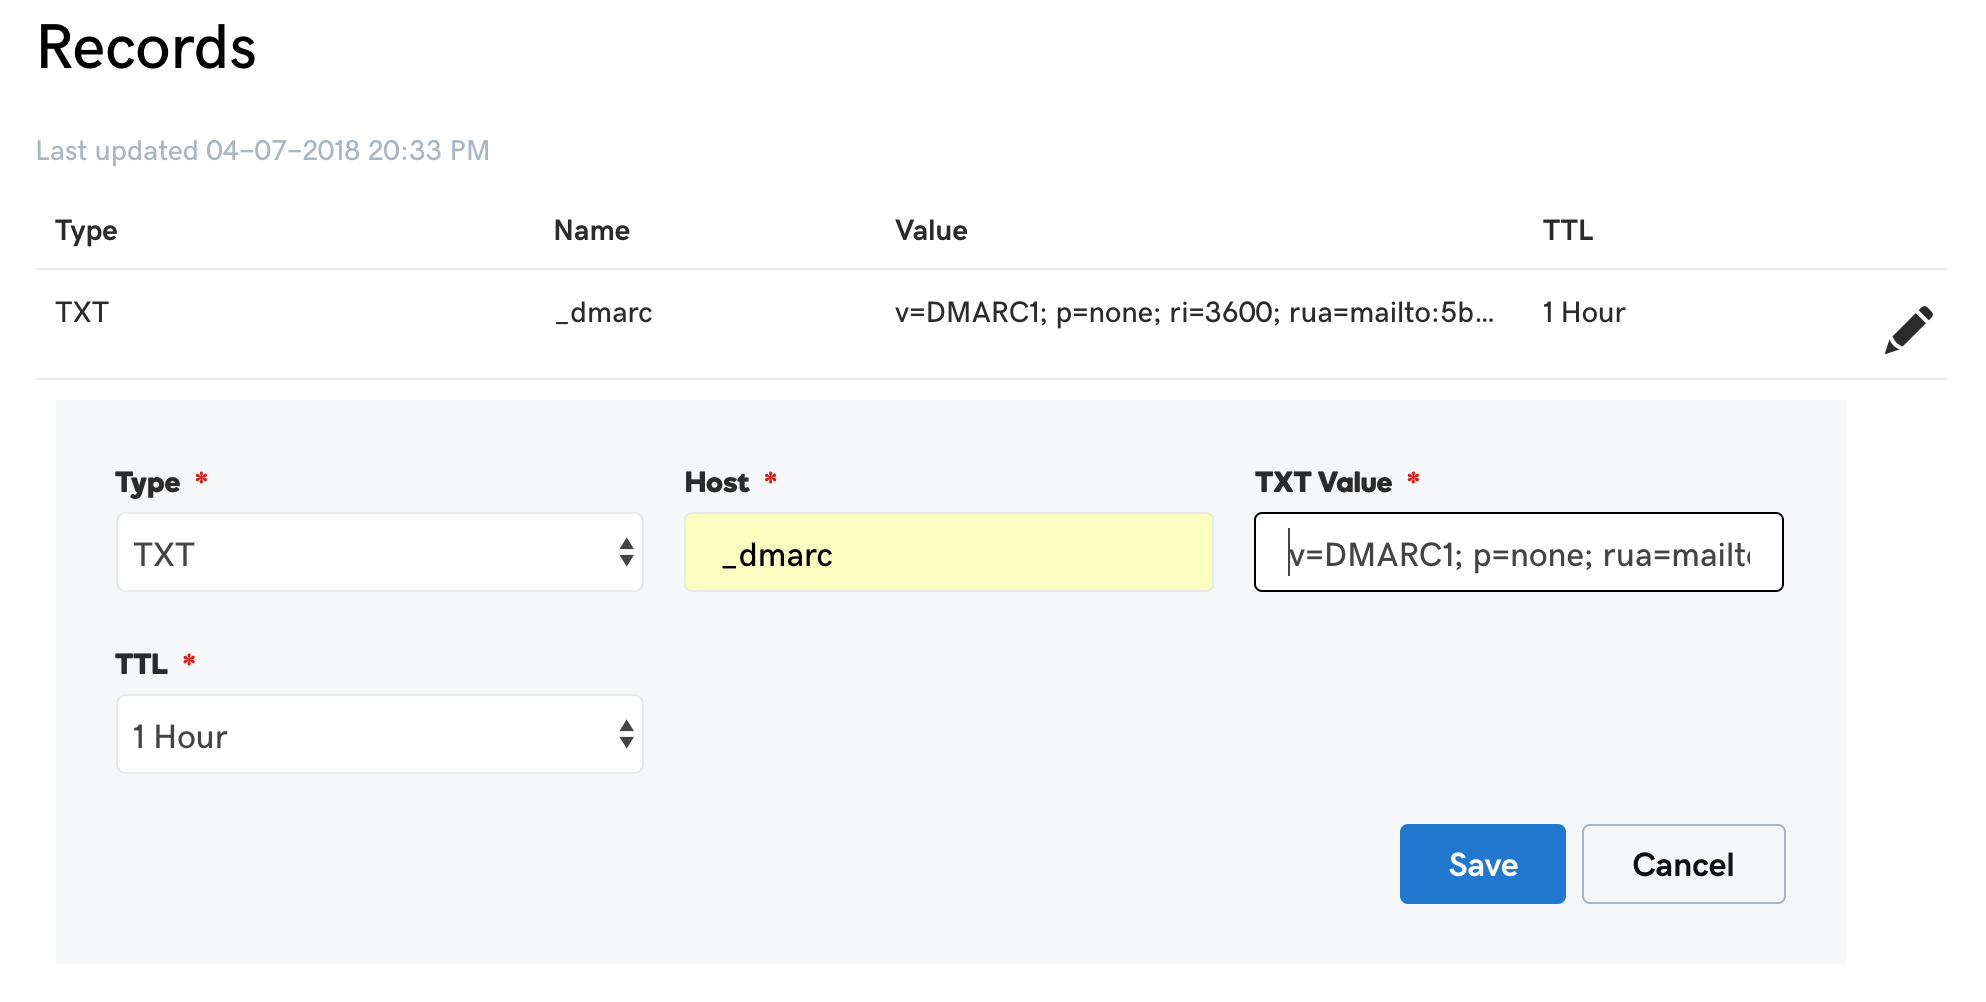
Create a TXT entry on mycompany.com with these settings:
    Type: TXT
    Host: _dmarc
    TXT Value: (DMARC record created in the previous step)
    TTL: 1 hour
For example, here is what it looks like in GoDaddy's DNS management console:
To publish a DMARC record in CloudFlare:

Check all records
Now that you have published all the DNS records, it's time to check if all SPF, DKIM, and DMARC are set up correctly.
To check if the whole deployment is correct, send an email from your domain to [email protected].
You will get a report on the deployments shortly.
Keep in mind that DNS propagation takes up to 1 hour, therefore, if you think your settings are correct, but find some issues in the report, wait a while and check again.